Sometimes when we are creating an iOS app with Xamarin, we choose to forego using the Storyboard designer, and simply create the user interface in C#. This works fine, but when using a UITableView, there are times when we want to design the UITableViewCell with the designer. Luckily, this is easy enough to do using a single .xib file in Xamarin Studio.
Sample code is available at my Github repo
Create the project
For this sample, we will start off with the Empty Project template.
File -> New Solution -> iOS -> iPhone -> Empty Project
Create the table view
Next, add a new class for the UITableViewController, cleverly named MyTableViewController.cs. In the AppDelegate.cs, set the RootViewController to our new class. In MyTableViewController, we'll load our data and wire the TableView.Source to MyTableViewSource.
public override void ViewDidLoad ()
{
    base.ViewDidLoad ();

    var conferences = ConferenceRepository.GetConferences ();

    TableView.Source = new MyTableViewSource (conferences);
}
Create the cell
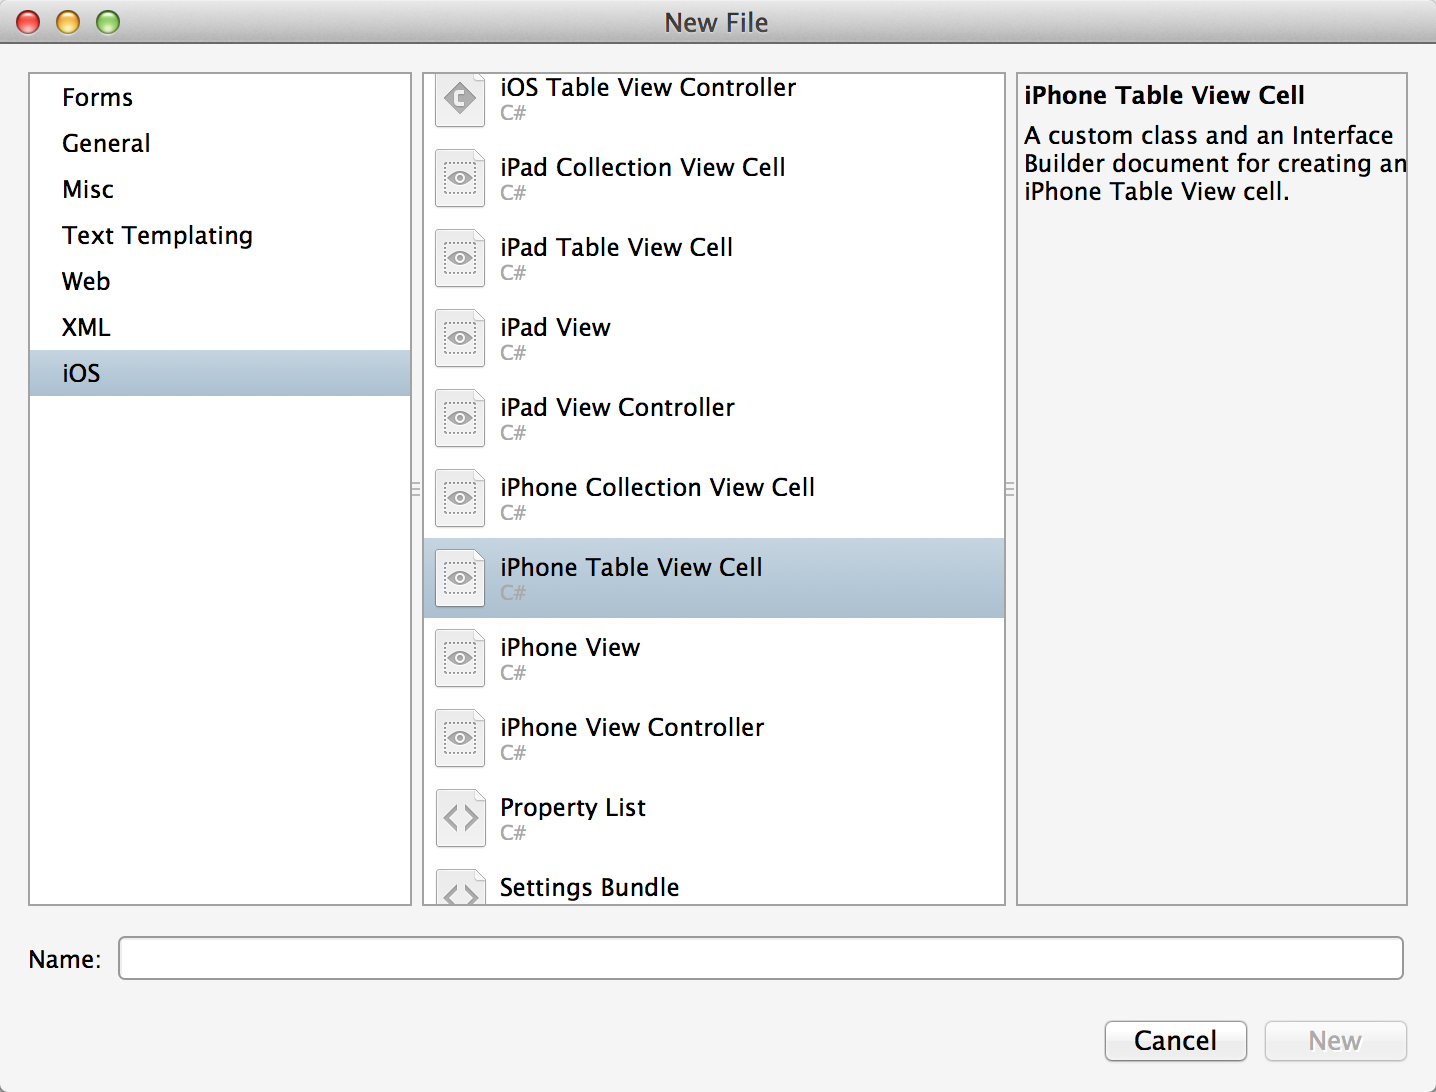
At this point, we have not used a designer for any of our UI. In fact, we don't even have a .storyboard or .xib in our project. In order to design our table view cell, we're going to add one now. We'll add a new file using the iPhone Table View Cell template, and name it MyCustomCell.xib.
Add -> New File -> iOS -> iPhone Table View Cell
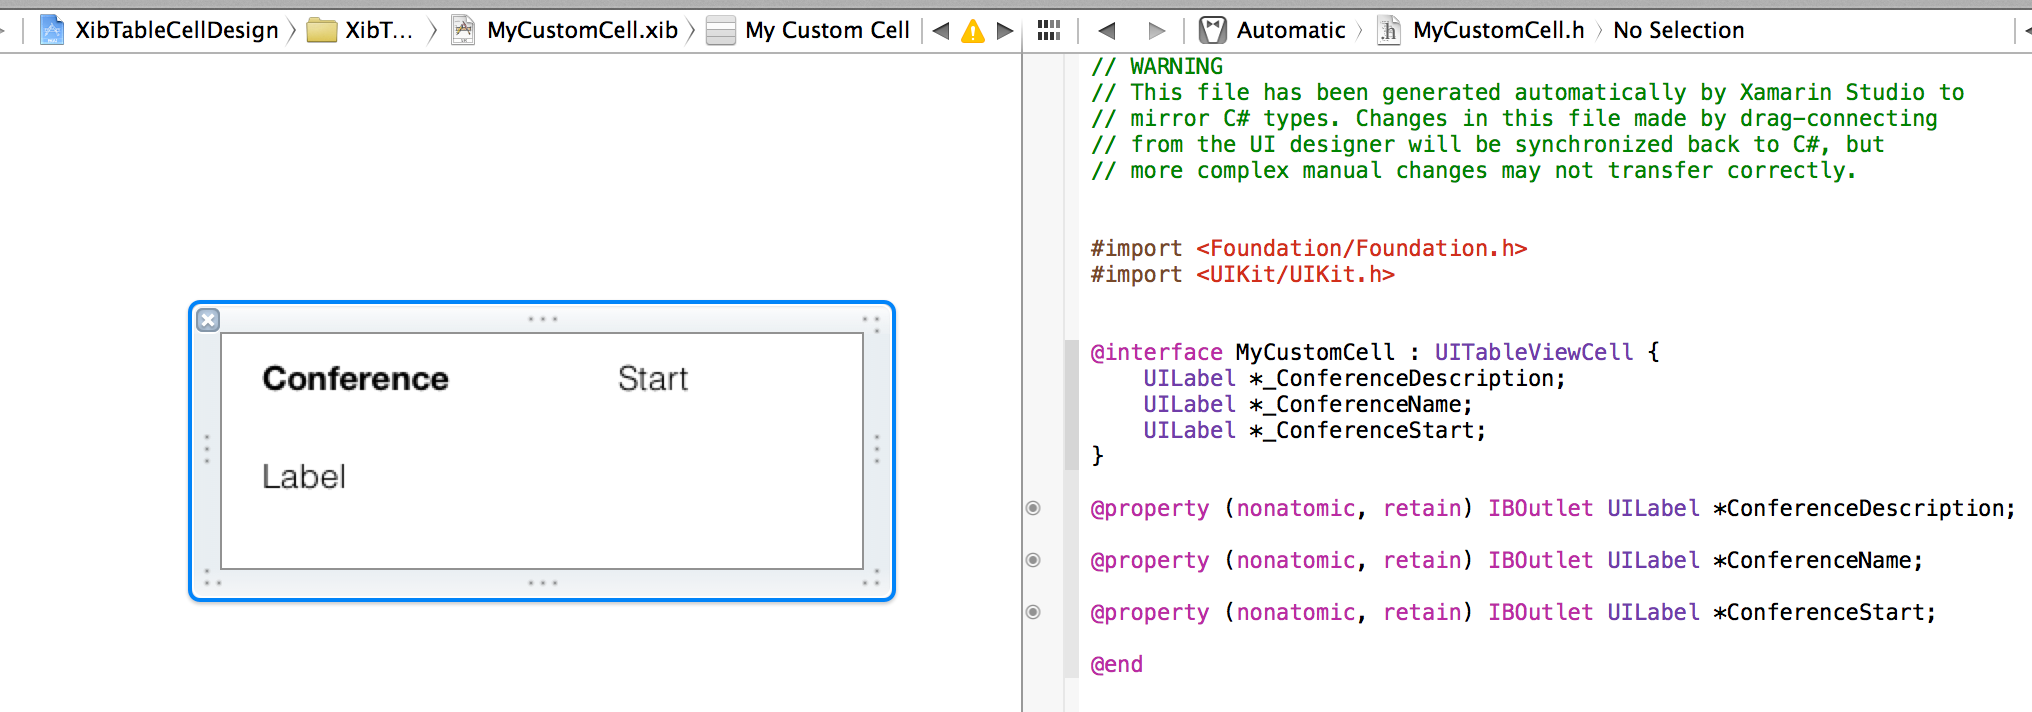
Xamarin Studio does not support designing .xib files, but double clicking on the file will open it in Xcode and allow us to design the cell.
As we drag our controls on to the design surface, we have to make sure that we wire up the Outlet in the header file. In Xcode, we do this by ctrl-click-dragging the control into the header file. Without the Outlets, we wouldn't be able to access the controls in our C# code.
Save the .xib and quit Xcode. Xamarin Studio will detect the change, and update the MyCustomCell.designer.cs file with the new Outlets.
using MonoTouch.Foundation;
using System.CodeDom.Compiler;

namespace XibTableCellDesign
{
    [Register ("MyCustomCell")]
    partial class MyCustomCell
    {
        [Outlet]
        MonoTouch.UIKit.UILabel ConferenceDescription { get; set; }

        [Outlet]
        MonoTouch.UIKit.UILabel ConferenceName { get; set; }

        [Outlet]
        MonoTouch.UIKit.UILabel ConferenceStart { get; set; }

        void ReleaseDesignerOutlets ()
        {
            if (ConferenceDescription != null) {
                ConferenceDescription.Dispose ();
                ConferenceDescription = null;
            }

            if (ConferenceName != null) {
                ConferenceName.Dispose ();
                ConferenceName = null;
            }

            if (ConferenceStart != null) {
                ConferenceStart.Dispose ();
                ConferenceStart = null;
            }
        }
    }
}
Add the model
Notice that these Outlets are private. We will not be able to access the controls from our UITableViewSource GetCell method, which is where we normally set our control properties, such as label.Text = value. We can get around this by adding a public property in the custom cell to set with our model data.
public partial class MyCustomCell : UITableViewCell
{
    public Conference Model { get; set; }
}
Then, in the LayoutSubviews method of our custom cell, we can set the control properties to the model object's properties.
public override void LayoutSubviews ()
{
    base.LayoutSubviews ();

    this.ConferenceName.Text = Model.Name;
    this.ConferenceStart.Text = Model.StartDate.ToShortDateString ();
    this.ConferenceDescription.Text = Model.Description;
}
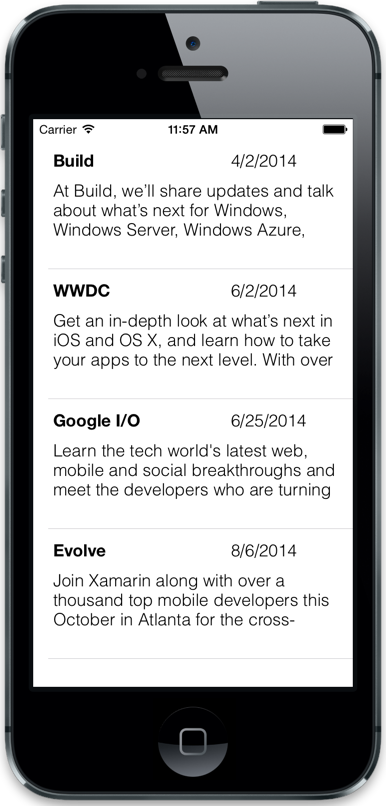
Use the cell
The last step is to create and use the cell in our table view source's GetCell method.
public override UITableViewCell GetCell (UITableView tableView, NSIndexPath indexPath)
{
    var conference = _conferences [indexPath.Row];
    var cell = (MyCustomCell)tableView.DequeueReusableCell (MyCustomCell.Key);
    if (cell == null) {
        cell = MyCustomCell.Create ();
    }
    cell.Model = conference;

    return cell;
}
Checkout the sample app on my Github repo for an example of designing a table view cell with Xamarin Studio and .xib files.