Writing applications, whether desktop, web, or mobile, is expensive. Developer time is a very limited commodity; one that we have to be careful not to waste. Two very common ways to waste developer time include writing code twice in order to fix what was broken the first time, and writing code that never should have been written in the first place.
Unit testing can help us deal with the issue of not shipping broken code. We should have a full suite of unit tests focused on the method level of our code. These unit tests should be lightning fast, run constantly, and verify that the code we wrote works the way that we expect it to.
Unit tests are invaluable, and I'm a huge fan of them, but they don't necessarily help us avoid writing the wrong code. As developers, every line of code that we write should be driven by an actual business requirement. These requirements are defined by the developers, the product managers, executives, possibly some users, and other important stakeholders working together. This communication between people is extremely important to writing the correct application and features from the start. It doesn't matter how wonderfully our code is executing if it's the wrong code. Typically, these requirements are written down in something like a Microsoft Word document, and passed around between all of the interested parties. The problem with this approach, though, is that it is very, very easy for these documents to be written once, and then become out of date or ignored as the development process begins. What we would really like is for our requirements to written in such a way that they are readable and understandable by all stakeholders, but also have them actually execute against our application in the same way that unit tests are executable.
Sample code is available at my Github repo
Behavior Driven Development
This is where Behavior-driven development, or "BDD", comes in.
"Behavior-driven development combines the general techniques and principles of TDD with ideas from domain-driven design and object-oriented analysis and design to provide software development and management teams with shared tools and a shared process to collaborate on software development.
Behavior-driven development borrows the concept of the ubiquitous language from domain driven design. A ubiquitous language is a (semi-) formal language that is shared by all members of a software development team — both software developers and non-technical personnel."
The main purpose of BDD is to facilitate the communication of an application's requirements between the stakeholders. We can write our software specifications in an easily readable and understandable syntax called Gherkin, which can also be used to create executable tests.
For this example, I'm going to use the Xamarin TaskyPro sample application. You can download the source code and run the application yourself, if you'd like. A precompiled binary is included in my sample.
Here you can see an example of defining the user-centric feature to add a new task to the TaskyPro list. Notice that this specification is easily understandable by developers and non-developers alike.
Feature: Adding a task
  I want to be able to quickly add a task

  Scenario: Add a task
    Given I am on the Home screen
    When I add a new task called "Get Milk"
    And I save the task
    Then I should see the "Get Milk" task in the list
Unlike unit tests, these tests generally concentrate on exercising the full running application. In our case, this will mean running an iOS or Android application on a simulator/emulator or on a physical device.
Cucumber and Calabash
When testing mobile apps, there is an existing solution that brings BDD and Gherkin to iOS and Android testing. This is the open source project named Calabash. Calabash uses the Ruby based framework named Cucumber to execute the acceptance tests defined from our specifications.
Xamarin.UITest
Xamarin.UITest is a very similar framework to Calabash, except it allows us to write our tests using C# and execute them using one of the common .Net unit testing frameworks, typically NUnit.
Xamarin.UITest gives us the means to write tests which interact with and verify the running iOS and Android applications, much like Calabash, but it does so in a much more developer oriented way.
The same test as above, written in Xamarin.UITest, would look like this.
app.Tap (c => c.Class("UIButton").Marked ("Add"));
app.EnterText (c => c.Class ("UITextField").Index (0), "Get Milk");
app.EnterText (c => c.Class ("UITextField").Index (1), "Make sure to get the milk!");
app.Tap (c => c.Class("UIButton").Marked ("Save"));
While this obviously achieves our goal of having automated acceptance tests, it doesn't help very much with our goal of improving communication among all the stakeholders. Developers are very comfortable reading code, but managers, QA, executives, users, and other stakeholders are not. What's missing from Xamarin.UITest is the Gherkin language.
SpecFlow
SpecFlow fills that void and allows us to write our specifications as Features and Steps written using Gherkin. SpecFlow then enables us to write the definition of those steps as C# code.
We can combine SpecFlow and Xamarin.UITest to give us all the benefits of BDD and Gherkin while using the C# language that we know and love.
Create the test project
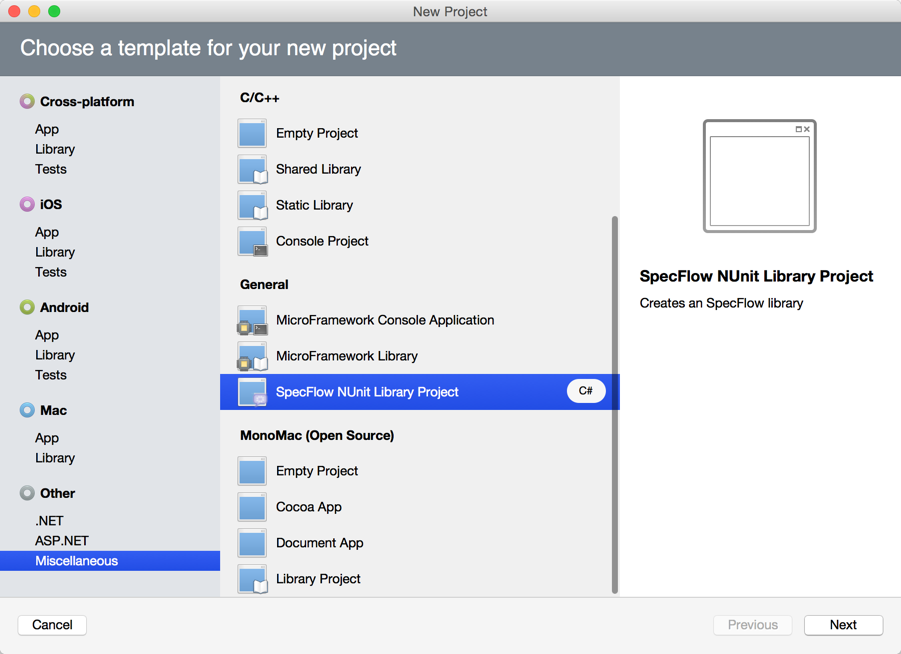
SpecFlow has a Visual Studio extension available which adds some templates and integration with the VS IDE. In Xamarin Studio, there is a SpecFlow addin available. The template will be installed in Other > Miscellaneous > General > SpecFlow NUnit Library Project
This will create a new class library with the NUnit and SpecFlow Nuget packages already added. Be sure to update the Nuget packages when you first create the project.
Add Xamarin.UITest
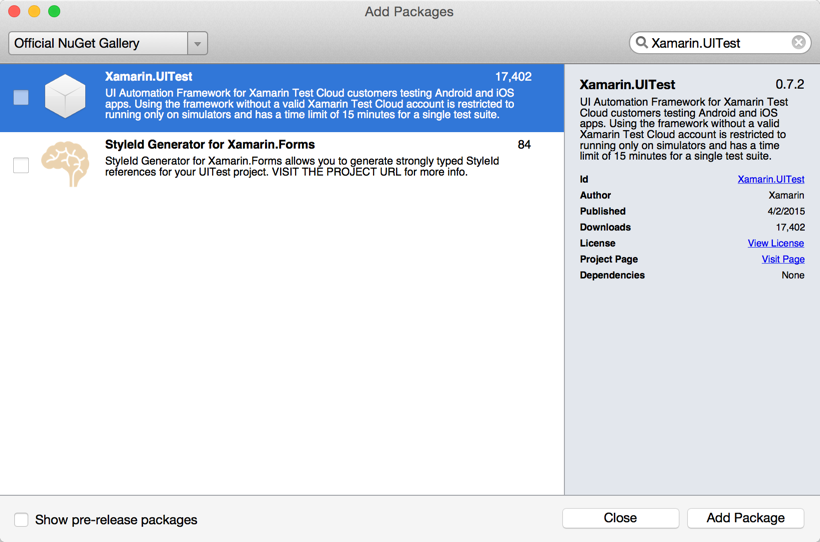
Next, we need to add the Xamarin.UITest Nuget package to the project.
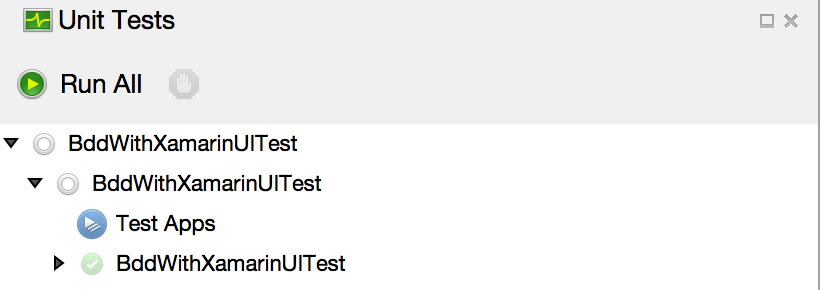
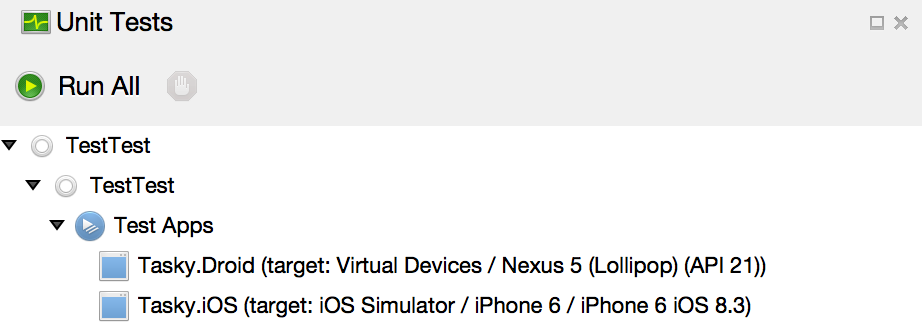
Once the Xamarin.UITest Nuget package has been added, the Unit Test window in Xamarin Studio will show a new section titled "Test Apps". We'll use this shortly.
Cross platform tests
If we had used the Xamarin.UITest template when we first created our test project, instead of the SpecFlow template, we would have had a project containing two files; AppInitializer.cs and Tests.cs. The AppInitializer class is a static helper class that will return an appropriate IApp instance configured for the currently executing platform.
public class AppInitializer
{
    public static IApp StartApp (Platform platform)
    {
        if (platform == Platform.Android) {
            return ConfigureApp
                .Android
                .StartApp ();
        }

        return ConfigureApp
            .iOS
            .StartApp ();
    }
}
The Tests class is where our NUnit tests would be defined. Notice the parameter to the [TestFixture()] attribute, which is where we can specify which platforms to run this set of tests on.
[TestFixture (Platform.Android)]
[TestFixture (Platform.iOS)]
public class Tests
{
    IApp app;
    Platform platform;

    public Tests (Platform platform)
    {
        this.platform = platform;
    }

    [SetUp]
    public void BeforeEachTest ()
    {
        app = AppInitializer.StartApp (platform);
    }

    [Test]
    public void AppLaunches ()
    {
        app.Screenshot ("First screen.");
    }
}
Add test apps
When configuring our IApp instance, we will need to specify where the Xamarin.UITest framework can find the binary applications to install and run. In the AppInitializer class, we actually have two different ways to specify the path to these apps.
First, we could simply pass the path to the binary to the appropriate platform specific method, either ApkFile for Android, or AppBundle for iOS. This allows us to execute acceptance tests against any compiled Android or iOS application, even ones written in Java or Objective-C/Swift (along with Xamarin.iOS and Xamarin.Android, of course).
public static IApp StartApp (Platform platform, string iOSSimulator)
{
    if (platform == Platform.Android) {
        return ConfigureApp
            .Android
            .ApkFile ("../com.xamarin.samples.taskydroidnew.exampleapp.apk")
            .StartApp ();

    } else if (platform == Platform.iOS) {
        return ConfigureApp
            .iOS
            .AppBundle ("../TaskyiOS.app")
            .StartApp ();
    }
}
Alternatively, as of Xamarin Studio 5.9, if we have the source code projects loaded in Xamarin Studio along with our test project, we can use the new Test Apps feature to point the test project at the source code project.
Once the test project knows about the source projects, the configuration no longer needs the path specified, and we can remove the ApkFile and AppBundle methods.
public static IApp StartApp (Platform platform, string iOSSimulator)
{
    if (platform == Platform.Android) {
        return ConfigureApp
            .Android
            .StartApp ();

    } else if (platform == Platform.iOS) {
        return ConfigureApp
            .iOS
            .StartApp ();
    }
}
Adding features
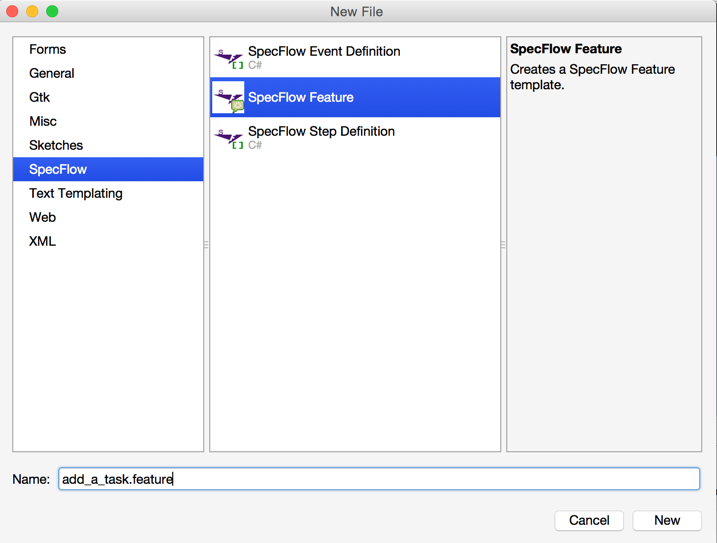
At this point, the test project is ready to start defining our features. The first feature for our TaskyPro application will be Add a Task. Features in SpecFlow are defined using a feature file. We can add one of these to our test project using the built in Xamarin Studio template.
You can delete the contents of this file, and replace it with the business defined specification for our application.
Feature: Adding a task
  I want to be able to quickly add a task

  Scenario: Add a task
    Given I am on the Home screen
    When I add a new task called "Get Milk"
    And I save the task
    Then I should see the "Get Milk" task in the list
When the project is saved and built, SpecFlow will read this feature file and create a partial C# class which can execute our test.
[System.CodeDom.Compiler.GeneratedCodeAttribute("TechTalk.SpecFlow", "1.0.0.0")]
[System.Runtime.CompilerServices.CompilerGeneratedAttribute()]
[NUnit.Framework.TestFixtureAttribute()]
[NUnit.Framework.DescriptionAttribute("Adding a task")]
public partial class AddingATaskFeature
{
  // .....
}
If there are any additions or customizations that we want to make to this class, we can implement the other part of the partial class (AddingATaskFeature.cs) and do it there.
public partial class AddingATaskFeature : FeatureBase
{
  public AddingATaskFeature (Platform platform, string iOSSimulator) : base(platform, iOSSimulator)
  {
  }
}
Customizing the steps
You may ask "What magic lets the computer know what I mean by 'When I add a new task...' ?". Well, it's not magic, it's the magic of C#! Each SpecFlow step that you write needs to have a corresponding method defined in a C# class somewhere. The class needs to have a [Binding] attribute, and the methods will have either a [Given], [When], or [Then] attribute with a Regular Expression that will match the step defined in the feature file.
using TechTalk.SpecFlow;
using Xamarin.UITest;

[Binding]
public class CommonSteps
{
    readonly IApp app;

    [When (@"I add a new task called ""(.*)""")]
    public void WhenIAddANewTaskCalled (string taskName)
    {
        // Test code defined here ...
    }

    // More methods defined here ...
}
Each method will then use the Xamarin.UITest framework to exercise and test the app.
[When (@"I add a new task called ""(.*)""")]
public void WhenIAddANewTaskCalled (string taskName)
{
  app.WaitForElement (c => c.Marked("Add Task"));
  app.Tap (c => c.Marked("Add Task"));
  app.Screenshot ("When I add a new task called '" + taskName + "'");
  app.WaitForElement (c => c.Marked("txtName"));
  app.EnterText (c => c.Marked("txtName"), taskName);
  app.Screenshot ("When I add a new task called '" + taskName + "'");
}
Cross Platform tests (part 2)
As you can see, our tests end up just being C# code. As with all code, we should try to not repeat ourselves. We want to write these test steps once and have them executed on both iOS and Android. The TaskyPro application presents a problem though. When the application was written, the various controls on the two platforms did not end up with the same text or the same name/id. This means that code which uses hard coded names in the Xamarin.UITest query selectors work on one platform and fail on the other.
app.EnterText (c => c.Marked("txtName"), taskName);
To get around this, we first will define an interface for the "screen" in the app that we'll be testing. The interface has properties for each control on the screen that we want access to.
public interface IAddTaskScreen
{
  Func<AppQuery, AppQuery> nameEntry { get; }
  Func<AppQuery, AppQuery> saveButton { get; }
  Func<AppQuery, AppQuery> deleteButton { get; }
}
Then, we create implementations of this interface for each platform, with the appropriate query selector.
Android
public class AndroidAddTaskScreen : IAddTaskScreen
{
  public Func<AppQuery, AppQuery> nameEntry { get; } = new Func<AppQuery, AppQuery> (c => c.Marked("txtName"));
  public Func<AppQuery, AppQuery> saveButton { get; } = new Func<AppQuery, AppQuery> (c => c.Marked("btnSave"));
  public Func<AppQuery, AppQuery> deleteButton { get; } = new Func<AppQuery, AppQuery> (c => c.Marked("btnCancelDelete"));
}
iOS
public class iOSAddTaskScreen : IAddTaskScreen
{
  public Func<AppQuery, AppQuery> nameEntry { get; } = new Func<AppQuery, AppQuery> (c => c.Marked("Name"));
  public Func<AppQuery, AppQuery> saveButton { get; } = new Func<AppQuery, AppQuery> (c => c.Marked("Save"));
  public Func<AppQuery, AppQuery> deleteButton { get; } = new Func<AppQuery, AppQuery> (c => c.Marked("Delete"));
}
Depending on the current platform, as defined in the [TestFixture] attribute, we can add the correct screen definition to SpecFlow's FeatureContext object from the AppInitializer class. Note that I also defined some ScreenName constants in order to get nice IntelliSense.
public static void InitializeScreens(Platform platform)
{
    if (platform == Platform.iOS) {
        FeatureContext.Current.Add (ScreenNames.Home, new iOSHomeScreen ());
        FeatureContext.Current.Add (ScreenNames.AddTask, new iOSAddTaskScreen ());
    } else if (platform == Platform.Android) {
        FeatureContext.Current.Add (ScreenNames.Home, new AndroidHomeScreen ());
        FeatureContext.Current.Add (ScreenNames.AddTask, new AndroidAddTaskScreen ());
    }
}
In the FeatureBase class, which is the base class for each Feature test in the project, we then call the InitializeScreens method before each NUnit test executes.
[SetUp]
public void BeforeEachTest ()
{
  app = AppInitializer.StartApp (platform, iOSSimulator);
  FeatureContext.Current.Add ("App", app);
  AppInitializer.InitializeScreens (platform);
}
The class which defines our steps will then grab the implementations out of the FeatureContext. We now can rewrite our Step using strong typed abstractions which will use the correct query selector for the platform.
[Binding]
public class CommonSteps
{
    readonly IHomeScreen homeScreen;
    readonly IAddTaskScreen addTaskScreen;
    readonly IApp app;

    public CommonSteps ()
    {
        app = FeatureContext.Current.Get<IApp>("App");
        homeScreen = FeatureContext.Current.Get<IHomeScreen> (ScreenNames.Home);
        addTaskScreen = FeatureContext.Current.Get<IAddTaskScreen> (ScreenNames.AddTask);
    }

    [When (@"I add a new task called ""(.*)""")]
    public void WhenIAddANewTaskCalled (string taskName)
    {
        app.WaitForElement (homeScreen.addButton);
        app.Tap (homeScreen.addButton);
        app.Screenshot ("When I add a new task called '" + taskName + "'");
        app.WaitForElement (addTaskScreen.nameEntry);
        app.EnterText (addTaskScreen.nameEntry, taskName);
        app.Screenshot ("When I add a new task called '" + taskName + "'");
    }
}
Multiple simulators/emulators
Lastly, when running the tests it is helpful to specify which simulators or emulators, including the operating system version, that you wish to execute on. Also, we generally want to reset the state of the simulator to clear any persistent state and run each test cleanly.
Note : resetting the iOS simulator currently only works on Mac, not through Visual Studio on Windows.
[TestFixture (Platform.Android, "")]

[TestFixture (Platform.iOS, iPhone5s.OS_8_1)]
[TestFixture (Platform.iOS, iPhone5s.OS_8_2)]
[TestFixture (Platform.iOS, iPhone5s.OS_8_3)]

[TestFixture (Platform.iOS, iPhone6.OS_8_1)]
[TestFixture (Platform.iOS, iPhone6.OS_8_2)]
[TestFixture (Platform.iOS, iPhone6.OS_8_3)]

[TestFixture (Platform.iOS, iPadAir.OS_8_1)]
[TestFixture (Platform.iOS, iPadAir.OS_8_2)]
[TestFixture (Platform.iOS, iPadAir.OS_8_3)]
public class FeatureBase
{
    // ...
}
You can read the code for this in the source project.
Thanks to everyone on this forum post for the code
Running the tests locally
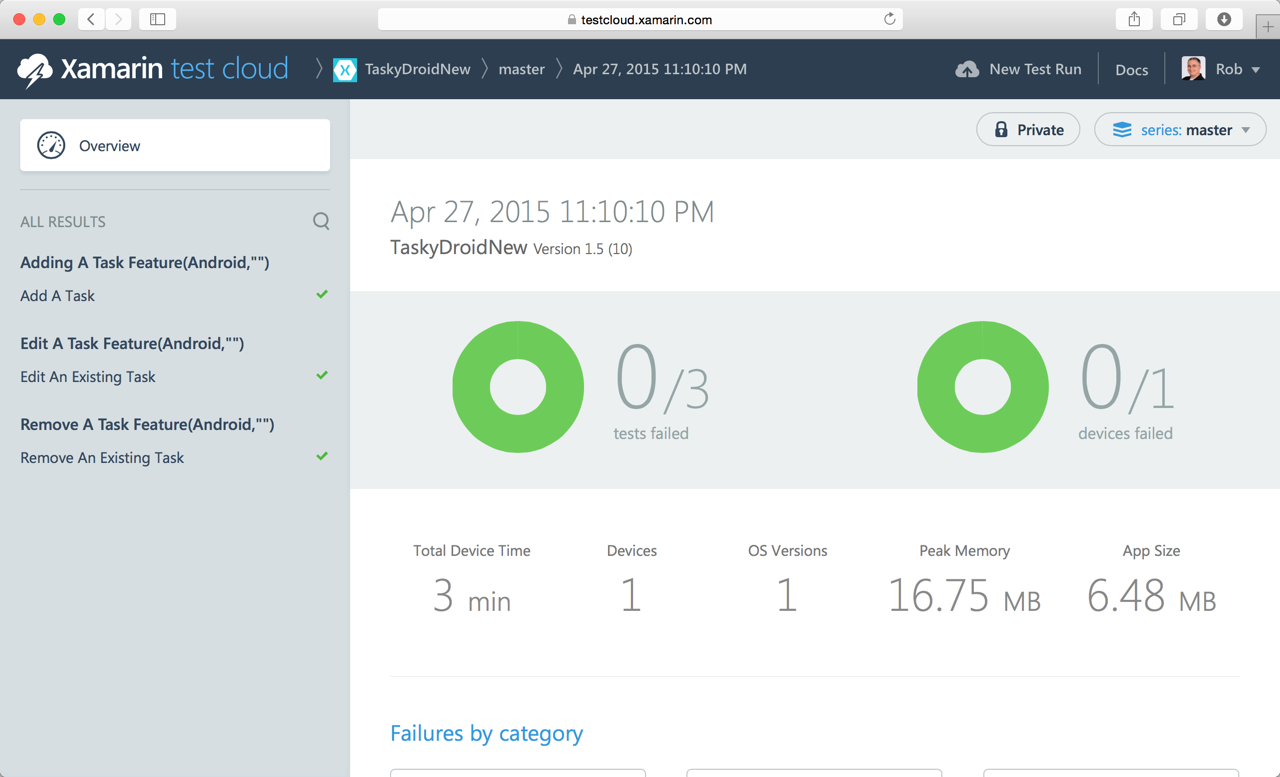
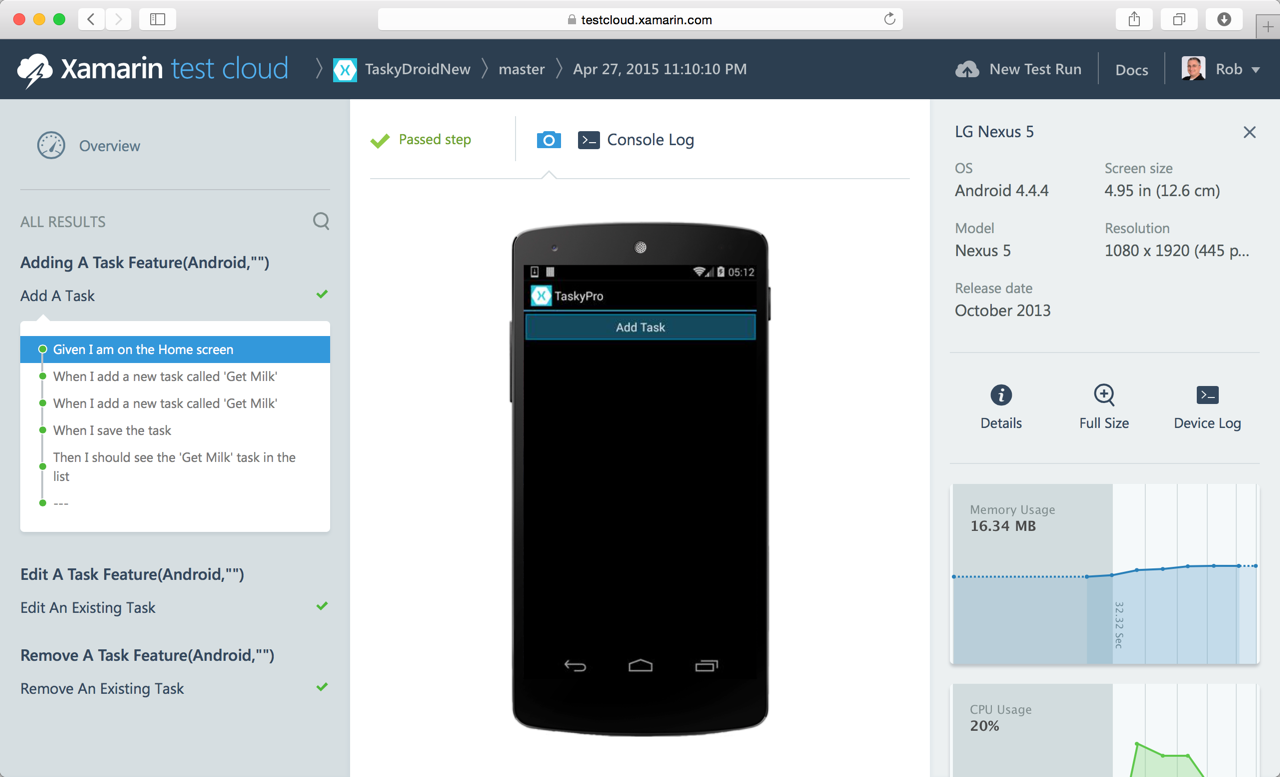
Xamarin Test Cloud
Even better than running these tests on local simulators and emulators would be to run them on hundreds or thousands of real devices. The great thing about using Xamarin.UITest is the ability to upload these tests to Xamarin Test Cloud. Xamarin Studio makes this as simple as right-clicking on the tests in the Unit Tests pad, and choosing Run in Test Cloud.
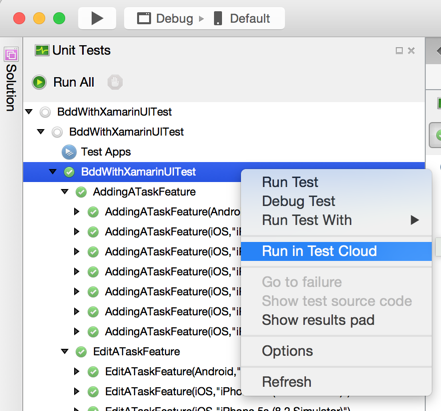
This will run all of the tests on either Android or iOS. You'll be able to see which tests pass or fail, the number of devices, OS versions, and a wealth of other information. We can even see the Gherkin steps in the Xamarin Test Cloud UI.
Sample code is available at my Github repo